Tuesday, February 08, 2022

A New Twist on an Old Favorite: Grapefruit Curd


I’ve been making lemon curd for close to 30 years. Initially, I would make a batch and refrigerate it, as I couldn’t find directions on how to can it. It seemed so much more delicate than jam or preserves. And given that it has eggs and butter, I was a fairly new and nervous canner. I remember calling in to a radio show my dad listened to when a well-known chef was on discussing canning. Question asked and answered. From then on, I have made double and triple batches at one time and canned that lemon curd safely.


Three weeks ago, my brother picked about 20 pounds of Meyer lemons and we met in Oxnard for a long weekend, part of which was spent canning lemon curd. Fifteen jars of it! We have since been in the California desert visiting family and getting a bit of respite from the freezing mountain temps. 


My godmother lives in a gated community called The Citrus, and throughout the property are lemon, mandarin, orange, and grapefruit trees. Residents (and guests) are allowed to pick all the fruit they want. Since I had my handy dandy canner with me (doesn’t everyone travel with one?), I thought I would give grapefruit curd a try, given their abundance this time of year. 


These were lovely ruby red grapefruits, bursting with bright pink juice. I used roughly the same recipe as with lemon curd, with one exception. Grapefruit juice is fairly mild in its singular form, but when boiled down you get a much more intense flavor that works well in the curd. I also threw in a bit of lemon juice to brighten/complement the flavor just a bit.


Needless to say, it was a hit. I ate it straight from the jar, but am looking forward to going home and making some crumpets on which to serve it. Nothing like a good crumpet with all its holes filled with curd to make me swoon. And you will too.


So here it goes…..


Grapefruit Curd

2 cups fresh-squeezed grapefruit juice

¼ cup lemon juice

7 tablespoons grapefruit zest

1 pound sugar

1 stick butter

8 eggs, lightly beaten


Boil the grapefruit juice down until you have 1 cup.

Before eggs....look at that color!


Combine juice, zest, sugar, and butter in double boiler over simmering water until the sugar dissolves and the butter melts. (I often use a very heavy bottom pan in lieu of a double boiler and it works if the heat is kept low enough and you stir constantly.)


Pour one ladleful of hot liquid into eggs, whisking constantly to temper the eggs. Repeat at least twice to warm up the eggs and keep them from curdling. Once warm, whisk the egss into the hot mixture, stirring constantly. 


Cook, stirring, until thick (about 20 minutes). 


Remove from heat, cool, and store in the refrigerator. If you want to can these, it will take 20 minutes in a hot water bath 


YIELD: approximately 5 cups.
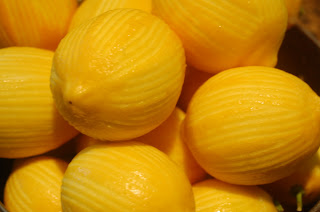
 

Monday, January 24, 2022

Changing it Up: Lemon Pesto Pasta


Lemons are one of my favorite foods/fruits/flavors. I am always looking for new ways to use them, particularly when gifted with my favorite Meyer lemons, which I can no longer grow high in the snowy mountains. Last weekend my brother raided his tree and brought 20+ pounds of Meyers to his beach house, where we met him for a few days. I was able to turn that bounty into 16 pints of lemon curd to share with everyone. 

We also collaborated on a pasta dish utilizing a few leftover Meyers. He made some yummy fresh pasta (although store-bought will do just fine) and I whipped up a lemon pesto to toss with the long strands of goodness. It’s a very simple dish that is made in about 20-25 minutes, start to finish. Pairs perfectly with a salad and nice loaf of sourdough.


Now, I was skeptical at first when I heard of lemon pesto, but being a lemon fiend I knew I had to try it. There are multiple recipes out there, so feel free to experiment by adding garlic or parsley, substituting cashews for the almonds, etc. We all agreed it was a nice departure from the typical basil pesto and really brightened up a cold winter night. 


Lemon Pesto Pasta

1 pound pasta

4 lemons, peeled thinly

½ - ¾ cup slivered almonds*

½ cup parmesan

Olive oil

Fresh ground pepper, to taste

Salt, to taste


Put your water on to boil and start peeling the lemons. 


Take half the peel and put into the water pot. Boil for 2-3 minutes, then strain out the peel and discard. (This helps to flavor the pasta.) Add in your pasta and cook to al dente.


In a food processor, place the remaining peels and the almonds. Pulse until you have a sandy crumb mixture. Add in the parmesan and pulse for 10-20 seconds. With the processor running on low, drizzle in enough olive oil to make a loose paste. When emulsified, add salt and pepper to taste.


Drain your pasta, reserving about a cup of water. Place your pasta back in the pot on low, adding in your pesto. Mix, adding water as you stir to help make a sauce. Turn off the heat and serve with extra parmesan. 


*I have also used the dry roasted, sliced almonds from Trader Joes and they work just fine.


Additional lemon recipes on Eating Suburbia:

Limoncello

Lemon Simple syrup (for iced teas, cocktails) 

Lemon Drop Cocktail

Lemon Curd

Lemon Curd Mousse Cake (aka cake of 1,000 bowls)

Lemon Meringue Frosting

Meyer Lemon Marmalade

Meyer Lemon Semifreddo

Glazed Lemon Bites

Meyer Lemon Ice Cream

Chicken Avoglemeno

Lemony Lentil Soup

Shaved Brussels Sprouts, Meyer Lemon & Quinoa Salad


And if that isn’t enough to satisfy you, you can find a recipe for Meyer Lemon and Gigante Bean Open-Face Sandwich in my second cookbook (Eating Suburbia) and recipes for Meyer Lemon Champagne Preserves, Meyer Lemon Cream Dressing, and Blueberry Lemon Cake in my third cookbook (Food Is Love). 


Tuesday, March 09, 2021

The Big Debate (in my head)


This morning my brother called me. He was enjoying toast with some of my homemade peach-vanilla jam and it reminded him that he recently had some lemon-pear marmalade that was out of this world. He gently suggested that I should make some when pear season rolls around. Definitely a good idea, as I like pears and lemons very much and already make several varieties of marmalade, as well as lemon curd, pear jam and pear butter. 

This conversation sparked a little niggle in my head…something that had been bothering me. Recently I saw a cooking competition with professional chefs. I’m always intrigued by how they use ingredients. But one chef made a dish in which she included a peach marmalade she had made on the spot. I was appalled that she labeled what she had made as marmalade—as it didn’t contain any citrus—and even more outraged that the judges didn’t call her out on it. Why you ask?


Well, I believe in certain distinctions between jelly, jam, preserves, marmalades and fruit butters. I probably have a unique but fairly professional view on the topic, as my family owned a processing plant that manufactured jellies, jams, preserves, and marmalades (as well as fruit filling, peanut butters, and some other odd and assorted items). I’ve also been home canning for 30 years, and actually built a canning kitchen on the old screen porch of our cabin. I’m also an editor who is a stickler for proper terminology. 


In my own head, which was confirmed by several other reputable and more objective sources, these distinctions include:


  • Jelly: uses fruit juice, requires pectin, final product has no chunks of fruit at all
  • Jam: uses mashed fruit, can be made with or without pectin, final product has some chunks of fruit
  • Preserves: uses whole fruit or large chunks of fruit, no pectin necessary, final product is mostly fruit chunks
  • Marmalade: uses whole citrus fruit, including the peel, no pectin, slivers of peel visible in final product
  • Butters: uses fruit puree, no pectin, no chunks of fruit in final product


So, by definition a peach cannot be made into a marmalade. However, my brother’s recommendation of lemon-pear marmalade can be classified as a marmalade as it has citrus fruit in it. 


Check back in the late summer/early fall 2021 when pears are at their ripest and I’ll give that lemon-pear marmalade a go…..

Wednesday, November 25, 2020

The Taste of Fall


As the leaves turn their magnificent fall colors—brilliant gold, burnt orange, deep red—there’s nothing more warming than a hot cup of apple cider. Redolent with traditional spices of cinnamon and clove (with an occasional hint of ginger or cardamom), this distinctly fall beverage perfectly captures the apple harvest in our area.


But apple cider isn’t just for drinking. It also makes a delicious caramel that is easy, albeit a bit time consuming, to make. I happened across an Instagram post from the Smitten Kitchen blog with a drool-worthy picture of said caramels. What I liked about the recipe, aside from the flavor profile, is that it uses fresh, local apple cider. Right now…especially right now…we are trying to support our small local merchants and farmers, so what better way than to buy some fresh unfiltered apple cider and make these treats?


The process is simple and doesn’t require any fancy tools or pans, although a candy thermometer does help immensely. The time-consuming part of the recipe is boiling down the apple cider until it is almost syrupy. Going from 4 cups of cider to 1/2 cup takes 30-45 minutes. You don’t have to stand and watch it. Just stir now and then. As it gets close to the end, it’s wise to hover a bit, so it doesn’t burn. But once you have your concentrate, you add the main ingredients, stir and boil until it hits about 252 degrees. Really, it’s just that easy.


When you take it off the heat you hit the mixture with a bit of cinnamon and flaky sea salt, which really makes the caramel pop. (I’m sure you could eliminate both and they would still be out of this world, but why mess with perfection?) Pour into your prepared pan and refrigerate until hard. Then enjoy the goodness. And while you’re at it, why not double recipe and spread the wealth? I shared with all my neighbors, to help ease the pain of celebrating Thanksgiving in isolation. 


NoteIf you don’t have access to fresh unfiltered apple cider from a local grower, most supermarkets carry unfiltered apple cider (NOT juice), which has been pasteurized and bottled and is shelf-stable.


Recipe after the jump…


Monday, November 23, 2020

Holiday Eggnog Bread

 My godmother is a good cook, when it comes to savory items. I’ve never really known her to do sweets. Partly because she and my godfather were not big fans of sugary treats and she rarely had time to put into baking.

One sweet treat she has been making for years—decades probably—is a delicious eggnog bread. It’s an easy semi-homemade loaf that is moist and full of flavor. The simple recipe is easily doubled (each batch makes two loaves), so that you can freeze some to have on hand for guests or to give away to friends and family. (It will be much more welcomed than the traditional fruit cake.) 


You can find the recipe for the eggnog after the jump and in my second cookbook, aptly named Eating Suburbia, available here.


NOTE: Last week I shared a cherished recipe for eggnog that was generously shared with me. It’s the perfect ingredient for this holiday eggnog bread, but if you don’t have the time or the inclination to make it, you can head to the store—COVID willing—and pick up some premade eggnog to use. 


Holiday Eggnog Bread

1 box yellow cake mix    

1/4 cup butter, softened

2 large eggs    

2 tablespoons rum

1 1/2 cups eggnog


Preheat oven to 350 degrees. Grease two loaf pans.


Beat eggs first then add the rest of the ingredients and mix well. Pour into prepared loaf pans.


Bake for 45 minutes. Allow to cool, then remove from pans.


Yield: 2 loaves


Monday, November 16, 2020

Tis the Season…for Eggnog

Almost a decade ago, my two oldest children rented a house together on one of the best blocks in Redwood City. The day they moved in, neighbors came by to welcome them, drop off a list of everyone’s phone number, and tell them about the Facebook group that the neighborhood had. 


In the years since, we’ve become part of that neighborhood by extension. The annual Easter Eggstravaganza and fall Oktoberfest have been highlights, where the street is blocked off and everyone shares in food and drink, games and karaoke. Halloween is an event, where over 500 kids come through to see all the decorations. Memorial Day, Fourth of July and Labor Day are often celebrated at The Resort, a beautiful home where one couple has a pool and a tiki bar and doesn’t mind a neighborhood invasion. 


Spending time with these generous and friendly people was a highlight of our time in the suburbs and we do miss it now being in the mountains. While we have been back for events since we moved, those events have been a little less sparkly and joyful due to the death of the street’s matriarch. Bobby was a gregarious, and sometimes outrageous, woman…one I think I’d like to be when I grow up. She often had wildly colored hair, brightly decorated nails, loved her Four Roses bourbon, and had a great laugh. She also made the very best eggnog I’ve ever had, although I rarely got much of it, as Mr. B quickly drank copious amounts whenever she delivered it to our house. 


Last week, Bobby’s daughter kindly shared the recipe for her eggnog, which not surprisingly contains her beloved Four Roses. She told Brilliant Daughter and me that Bobby would want us to have it. And because it’s just so darn stinkin’ good, I wanted to share it as well. It’s the perfect time for it, with the holidays winging our way.


So, a big “Cheers” to Bobby, may she smile down upon us as we enjoy this delicious beverage. And “cheers” to all of you, hoping you have a happy and healthy holiday season.


Bobby’s Famous Eggnog 

12 egg yolks

1 cup sugar

2 tablespoons vanilla

2 quarts half and half

¼ cup Meyers dark rum

¾ cup Four Roses bourbon

Cinnamon and nutmeg to taste


Blend egg yolks, sugar and vanilla with a hand or stand mixer until light yellow. Add the half and half slowly and mix completely. Add in rum and bourbon, then stir in cinnamon and nutmeg. 


Refrigerate immediately. Good for up to two weeks. 


Side Notes:

And while it may be sacrilege to utilize this delicious eggnog into anything other than a beverage, you might want to use it to make eggnog bread, which is a simple treat that is easily frozen for later enjoyment and makes a nice gift to neighbors. I’ll share that recipe later this week.


And don’t throw out those egg whites either. They can be scrambled for a healthy breakfast or made into these delicious meringues, which are sweet and chocolate-y and will satisfy the biggest sweet tooth and the dieter alike—as they are only 30 calories apiece.


Chocolate Chip Meringue Cookies

4 egg whites, at room temperature

1 teaspoon vanilla

1/4 teaspoon cream of tarter

1 1/3 cup granulated sugar

1 1/3 cups mini chocolate chips


Preheat oven to 275 degrees. Line a cookie sheet with Silpat or parchment paper. 


In a medium mixing bowl with whisk attachment bowl, beat egg whites on super high speed until soft peaks form. Add cream of tarter and vanilla and mix again for 30 seconds. Scrape the bowl and return to high speed and add sugar 2 tablespoons at a time. Beat on high until the meringue holds very stiff peaks. Gently fold in the chocolate chips.


Drop mixture by rounded tablespoon 2 inches apart on the prepared cookie sheet (a mini ice cream scoop makes even-sized domed cookies; a pastry bag yields cookies with a gentle swirl pattern). Bake the cookies in the oven for 25 minutes or until the bottoms of the cookies are lightly browned. Turn oven off and let cookies finish cooking for 15 minutes. Remove and transfer cookies to a wire rack and allow to cool.