Showing posts with label bacon. Show all posts

Wednesday, February 26, 2014

Week 9: Candied Bacon Lollipops


Recently, my brother shared with me this recipe for candied bacon lollipops, a gem he found in a recent issue of Wine Spectator, of all places. It was probably his passive-aggressive way of telling me that next time I visit, I need to bring a slab of our homemade bacon so that we can test this recipe. But I am not planning a visit any time soon, and I just cannot wait. I mean, really, who can resist a recipe like this? It cannot languish in my recipe pile, hidden away and forgotten. No, it must be tried….now.

Admittedly, I am making this in the morning, when in fact it is designed as a cocktail bite. But bacon of any kind is good in the morning, and I can tell you that not one person in my house is complaining about the hour these are being served. If I am lucky, we might have a few left to have tonight with a cold beer or maybe a glass of wine. (Given that this appeared in a wine magazine, I wonder what I should pair with these lollipops. Any suggestions?)

I was hesitant to use 2 1/2 pounds of bacon for only 20-25 lollipops. Not only did that seem like a lot of bacon, I thought that a 1” x 1” square might be on the large side. So I chose to make the pieces a bit smaller, which yielded a larger quantity. Some shrinkage does occur, so use your judgment on the size. (You can also halve this recipe if you are not serving a crowd – rule of thumb is half as much sugar as bacon. So if you are using 1 pound bacon, use 1/2 cup sugar.)

In addition to adjusting the size, I made a few other small adjustments to the recipe: (1) When tossing bacon pieces with the sugar, you will notice that not a lot sticks. I found that by putting a bit of the excess sugar in my palm and squeezing it around the bacon piece a few times, I could get more to adhere, meaning less was scattered willy nilly around the pan. (2) Placing bacon pieces closer together and toward center of pan helps reduce the amount of burning sugar, some of which is inevitable around the edge of the pan.  (3) After the pan has been out of the oven for one minute, remove bacon pieces from silicone mat with tongs and turn bottom side up on wax paper. If you leave the bacon pieces on the mat for the full 5 minutes to cool, the sugar starts to set up and adhere to the bacon in strange shapes, making for an unpleasant-looking appetizer.  

Note: I think you could cut the bacon pieces, coat it and stick the pan in the fridge until you are ready to cook them, making it a very easy party food.

Now to the taste test. As expected, these were a big hit with everyone who tried them. I also found them extremely addictive. I literally had to box up half the pieces and put them in the refrigerator for fear I might eat them all. The lollipops are sweet and salty, soft and crunchy all at the same time. Using a good quality, smoky bacon will yield the best result. You want some good fat in there so the softness contrasts with the chewy bacon and crispy sugar coat.

Considering how little time these took, the ease of cooking, and the resulting taste, this recipe is a winner. (Thank you Michael. I promise to make some for you next time we are together.) 

UPDATE 2/27/14: Said brother has recommended a "crisp Sauvignon Blanc" to pair with this awesome appetizer.


Wednesday, January 29, 2014

Week 5: Spicy Rainbow Chard with Bacon and Polenta


This week’s recipe comes from the December 2012 issue of Sunset magazine. I have been a loyal reader of Sunset since I was in my teens. I know that might sound strange, but it is the truth. My mother was not a very good cook and had a small repertoire that primarily consisted of spaghetti, meatloaf, pork chops, baked chicken, and casseroles. So I took over much of the cooking when I was in high school. Given that we had only 3 ancient cookbooks, my only source of current recipes was the monthly issue of Sunset that my aunt would drop off. It was kind of like a family subscription: my aunt paid for it, then I read it, then my mom, and then we would pass it off to my nana. Invariably she would pass that off to a friend as well. I’ve had my own subscription for many years, and I always find at least one recipe in each issue that I want to make.

This recipe caught my eye because I grow chard and love bacon. But then, I would eat bacon with just about anything. That being said, I am a bacon snob and generally only eat my own cured and smoked bacon. Butcher Son and I began doing this in 2011 when we acquired a smoker that belonged to my godfather. It is not a difficult process and the final product has a real smoke flavor that resonates throughout the whole slab of bacon…not that fake smoke flavor that leaves a bad taste in your mouth. I also love having the ability to cut the bacon to my own specifications, depending upon the recipe: lardons, thin cut, thick cut, and even end cuts which I use to flavor soups.

Somehow, I find myself in the odd predicament of being completely out of my homemade bacon; a rare occurrence that has caused me no lack of angst. This catastrophe led me to purchase thick-cut bacon to prepare this recipe. I thought Smithfield seemed like a good choice. They have been around for 70 years and seem to know their pork products.  However, opening the package, I found the bacon to be anything but thick cut. It stretched out when I tried to separate the pieces, each piece flopped in my hand, and when cooking it shriveled into weird shapes and did not cook evenly. A travesty from a company that espouses handcrafted excellence. But enough of my bacon rant and on to the recipe…

As usual, I did not follow the recipe to the letter, altering it based on my own preferences and ingredients. The original recipe called just for chard, but I also had a good crop of kale that needed to be harvested, so I mixed the two. (You can use two bunches of chard if you prefer.) The recipe also called for discarding the bacon fat and cooking the greens in olive oil. I really felt that the bacon fat would enhance the flavor of the dish, albeit make it less healthy. But I was willing to make the tradeoff.

Timewise, this dish took about 30 minutes. I set the polenta up to cook, while I prepared the greens and started the bacon. It’s a simple two-pan dish, does not require any particular skill, and was a keeper in the eyes of Mr. B. The small amount of chile pepper adds a good kick to the chard, but it will be too much for younger children. In fact, my kids would not have been fans until their late teens.

One last note: The recipe says it serves 4, but in my estimation, it would serve 4 as a side dish. Mr. B and I each had a serving and there was maybe a third portion left, and we are not gluttons. So I suggest you either serve a nice roasted chicken or grilled steak alongside, or increase the ingredients by half.

Spicy Rainbow Chard with Bacon and Polenta
1 cup polenta
1/2 teaspoon salt
6 slices thick-cut bacon
2 large shallots, chopped
2 garlic cloves, minced
1 large bunch rainbow chard
1 large bunch kale
1/4 to 1/2 teaspoon red chile flakes
1/3 cup water
2 tablespoons butter
2 teaspoons balsamic vinegar
1/2 cup grated Parmesan cheese

Cook the polenta with salt as the package directs. Meanwhile, cut the ribs out of the chard and kale and slice into 1/4-inch pieces. Roughly chop the leaves. Chop up the garlic and shallot.

In a hot pan, fry your bacon until just crispy. Remove from pan and drain on paper towels.  Crumble once cool.

Reduce the heat of the pan and add your shallots, garlic, and chard ribs until softened. This will take 4-5 minutes. Stir in your chard and kale leaves, chile flakes and water. Cover, reduce heat to low, and cook until wilted.

Stir butter and cheese into the polenta and spoon into bowls. Toss the chard with the balsamic vinegar and spoon over polenta. Sprinkle bacon crumbles on top and hit it with a final shot of Parmesan cheese.

Yield: 4 small or side servings

Monday, January 07, 2013

Winter Warmth: Creamy French Lentil Soup


Cold winter days call for hearty soups and one of our mainstays is this creamy French lentil soup. The recipe elevates the lowly lentil, which is quick to cook, cheap to buy and good for you, but often overlooked.

Lentils are a member of the legume family and come in a variety of colors from a dull brown to green, to French black to a vibrant red/orange, and are sold in one-pound bags or in the bulk aisle of grocery stores. The benefits are myriad and, given their diminutive size, rather amazing. First is the amount of dietary fiber packed in these little guys; one cup provides 62% of your daily dietary fiber requirement, which in addition to the high percentages of magnesium and folate, make them a heart healthy choice. You also get six minerals, two B vitamins, and 35% of your daily protein requirement, and it only adds up to 229 calories. All this and they are basically fat-free.

Lentils can be cooked plainly with some diced garlic and onion and curry to make a simple daal (served with plain yogurt), or they can be dressed up with lots of veggies, herbs, and meat, and served for supper, like they are here.

This recipe took about 5 minutes to prep and 10 minutes of hands-on cooking time, and spanned 80 minutes start to finish, the bulk of which it is just simmering on the stove. So you can come home, get it started, and relax for an hour or so. Served with some hearty bread, this makes a complete meal, given the vegetables incorporated in the soup.

Note: While the recipe calls for bacon, chicken stock and cream, you can make a vegetarian and vegan version. The bacon can be omitted, using a bit of olive oil to sauté the onions and garlic. Vegetable stock can substitute for the chicken stock, and there are vegan (soy, tofu and nut-based) cream alternatives.

Creamy French Lentil Soup

4 ounces sliced bacon, diced
2 cup diced onions
1 tablespoon chopped garlic
1/2 teaspoon dry thyme
1 cup diced carrots
1 cup diced celery
1 cup brown lentils
2 quarts chicken stock
2 cups diced tomato
3 bay leaves
1 cup whipping cream
Salt, nutmeg, cayenne, and white pepper to taste
2 tablespoon chopped fresh basil

Heat a 4-quart pot and cook bacon until crispy. Add the onions and garlic and cook over a medium heat until brown. Then add thyme, bay leaves, carrots, celery, and lentils and stir well. Add the chicken stock and bring to a simmer, and cook for 40 minutes until the lentils are soft. Cover the pot and cook for an additional 10 minutes.

Uncover the pot and add the tomatoes, cream, basil and seasoning and return to a simmer for 5 minutes.

YIELD: 6-8 servings

Tuesday, June 05, 2012

Pork Belly to Pancetta: Taste in the Making


I’m no stranger to pork belly. Butcher Son regularly brings me home slabs to turn into bacon, which I happily do. I’ve experimented with various rubs: brown sugar, molasses, pepper. I’ve smoked the slabs in a converted Weber and an electric smoker, and used several species of wood chips. But I have never attempted to make anything harder with that pork belly than bacon. Until now….

I decided I wanted to try to make pancetta. I read up on the process in several books I own, and finally chose to follow the directions in Charcuterie, The Craft of Salting, Smoking and Curing by Michael Ruhlman and Brian Polcyn. Then Butcher Son brought me home two 10-pound slabs of pork belly. I cut out the choicest 5-pound piece for the pancetta, and cut the rest to make bacon.

After skinning the slab*, I assembled the ingredients for the curing process. The dry cure used for pancetta is different than that which I use for bacon. The recipe called for pink salt. Initially I thought this meant pink Himalayan salt, but after thinking about it for awhile, I began to wonder why such a specific salt was included, so I did some searching and found that “pink salt” is the trade term for “curing salt” and is actually pink. Unfortunately, I couldn’t find it at any local stores and had to send Mr B off to Williams Sonoma to pick up a jar ($9.50).


Once he returned I mixed the pink salt with garlic, salt, brown sugar, fresh ground black pepper, crushed juniper berries, bay leaves, freshly grated nutmeg and sprigs of fresh thyme from the garden. 


After massaging it in vigorously, I vacuum sealed the slab and placed it in the refrigerator. Every other day I took it out, massaged the belly (called overhauling), and put it back in the fridge. 


After 10 days it was firm and considered cured. At this point it was time to rinse, dry, smear with fresh ground pepper and roll that sucker up for the drying process. Butcher Son asked around and got some good tips on rolling and tying, one of which was that if he didn’t end up with blisters, he was doing it wrong. I thought that was a bit extreme, but shame on me for doubting the experts.


The goal when rolling is for the belly to be as tight as possible with no air in the middle. Rolling the belly isn’t the hard part, it’s the tying that requires brute strength. You start in the middle and work your way out, so that there is little to no air between the interior rolls. After the 4th tie, Butcher Son found himself with missing skin off both his pinkies from tying so tightly. Apparently he just skipped the blister stage.


Once the pancetta is rolled and tied it needs to go into a cool humid place. The book suggests between 50 and 60 degrees and 60 percent humidity. We happen to have an old wine refrigerator that works fine, but is noisy as all get-out. We had to remove it from the dining area due to the issue and it now resides in a corner of the garage. So we plugged it in, placed a pan of ice cubes in the bottom and laid the roll on one of the shelves.

Every afternoon (when it was warmest) we dumped the pan of water and added more ice. Every other day we turned it a quarter turn and checked to make sure that the pancetta was not getting too hard and drying out too much. It takes approximately two weeks to dry sufficiently. You may notice small white dots of mold on the end pieces. This is fine, it will be cut off before eating.

What you want is a semi-firm roll. Too hard and you know you’ve gone too long. There is some shrinkage due to the drying process, so the five-pound pork belly you started with will end up being closer to 4 (and a squosh).

I have to tell you it was mighty hard to wait two weeks to taste it. And Butcher Son wanted to wait three! So we compromised. I cut off one dry end and then 1/2 pound to make some pasta carbonara. And we have stowed the pancetta in the wine fridge for one more week. Meanwhile, it looks gorgeous and tasted heavenly in the carbonara dish. (Served with a salad straight out of our garden and fresh artisan bread baked with our own herbs!)

I think I might use a bit more herbs in the initial curing, and definitely use more pepper prior to the rolling process, but as pancetta goes, this is a winner. Can't wait for the next taste test.

*NOTE: Always ask for skinned pork belly – it will make your life sooooo much easier.

Saturday, May 26, 2012

Going Whole Hog


Well, not really WHOLE hog, just the belly of the beast. Yep, last week we cured, rendered, smoked or ate 20 pounds of pork belly. Now before you get on your high horse about how unhealthy that is, let me tell you that it wasn’t all consumed in one sitting. But I have found that when I am doing anything homemade, more is better. Like canning. Why make 5 jars of jam, when 10 jars are just as easy. Same thing with the belly.

It all began because we ran out of our home-cured bacon. Bacon that we not only enjoyed as a breakfast item, and in soups and other savory dishes, but also in bacon fat caramels. (More about that later.) So it was time to rub some belly and get the smoker out. And because we donated homemade bacon (and a box of those delish bacon caramels) to a fundraiser, more was required. We also share the bounty with Brilliant Daughter and Electrician Son.

So, two 10-pound pork bellies made their way to my kitchen. I cut the choicest 5-pound slab for my first foray into pancetta, for which I will dedicate a whole post to next week. Then I cut four slabs for bacon, and had one small slab leftover that I slow-roasted.

I wrote a post about “Makin Bacon” last year, when we first started making our own. We have since graduated from a repurposed Weber to an electric smoker that belonged to my godfather and is probably 15 years old. It takes a bit less tending and has 3 racks, making the smoking process more efficient and the end result is just as good.

As for the slow-roasted pork belly, I can tell you it’s not for everybody. Butcher Son’s girlfriend doesn’t like fat, and there is definitely a good amount on a belly, so we made it on a night when she wasn’t sitting at the dinner table.

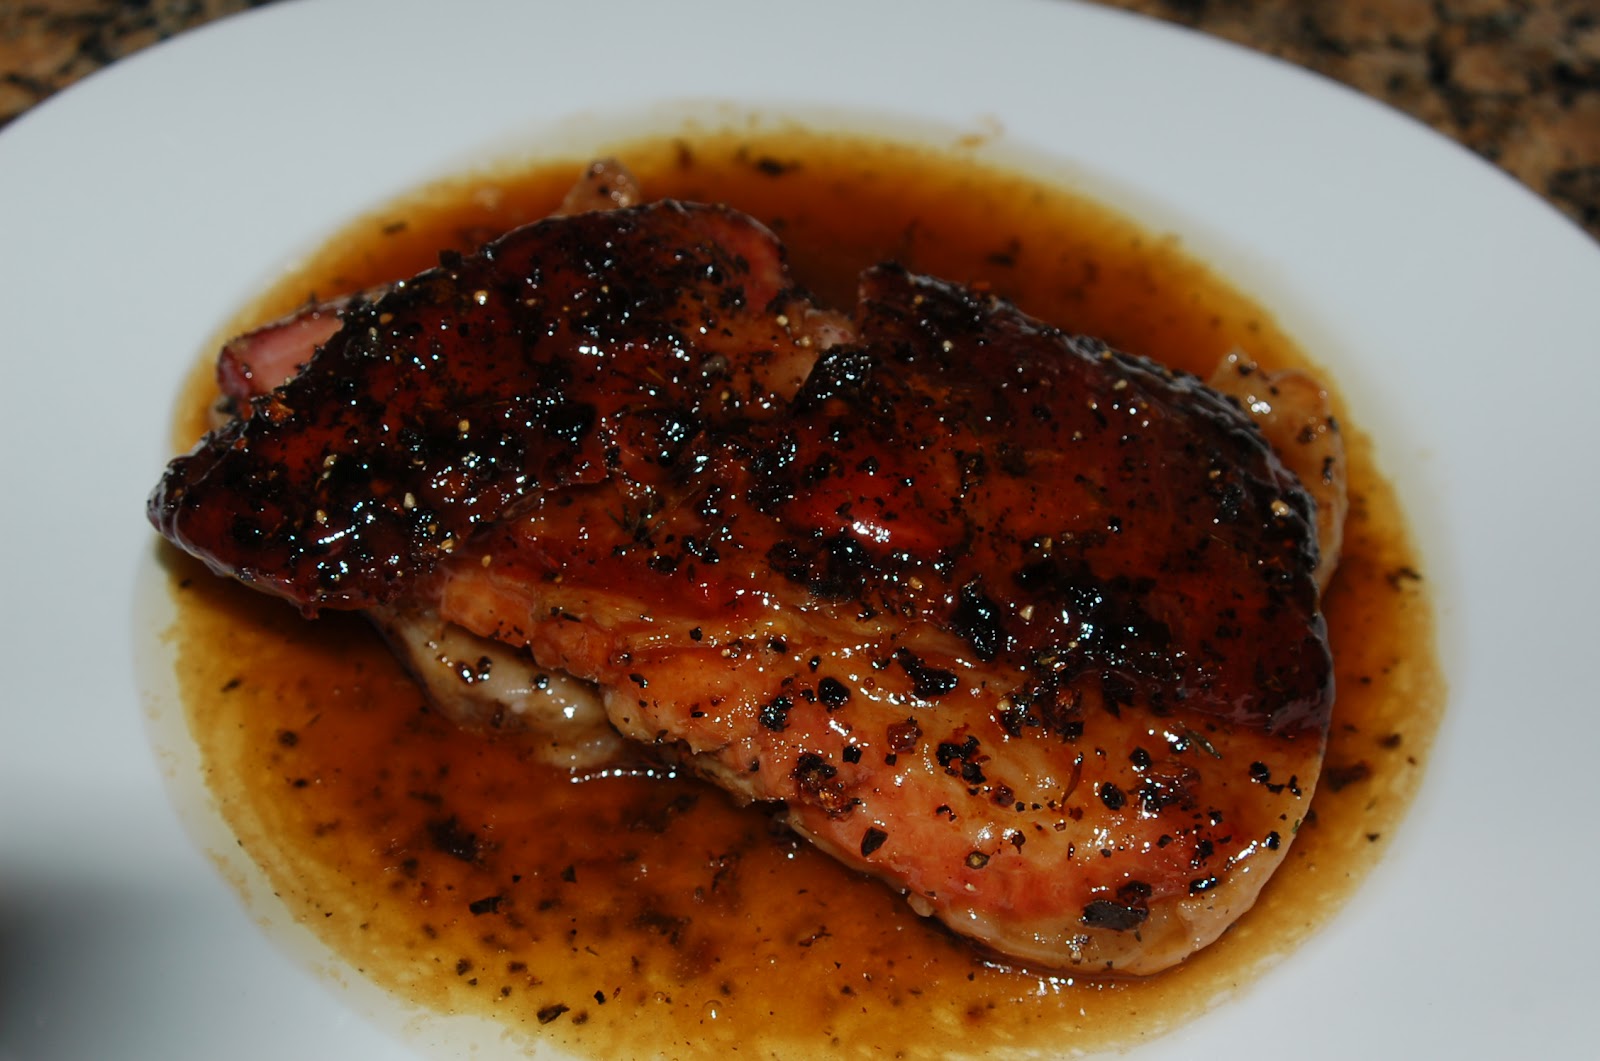
The slow roasting, with nothing more than a few herbs and a finishing glaze, completely changes the texture of the fat. It just melts in your mouth. One caution: you cannot eat much of this and a small 1.5 pound slab feeds 6 easily. It also needs to be served with a starch, like rice, couscous, polenta, potato.

While it takes a significant amount of time to roast pork belly, it is so worth it, and requires no tending. You rub it up, stick it in the oven and voila! Topped with a Makers Mark bourbon glaze and you have one delicious serving of heart-clogging proportions.

I found the recipe on the Maker’s Mark site, which encourages cooking with bourbon, obviously. But the glaze added just the right amount of flavor and complemented the pork perfectly. 


So next time you are feeling adventurous, stop by your local butcher (there is a really cute one at Robert’s of Woodside!), and pick up some pork belly for dinner.

Slow Roasted Pork Belly

1/2 cup Maker’s Mark® Bourbon
2 pounds pork belly, skin on
1 tablespoon kosher salt
1 teaspoon freshly ground white pepper
1 tablespoon fresh sage, minced
1 tablespoon fresh thyme, minced
2 tablespoons garlic, crushed and minced
1/4 cup honey
2 tablespoons sherry or apple cider vinegar
2 tablespoons butter
2 teaspoons kosher salt
1 teaspoon cracked black pepper

Preheat oven to 275°F. Using a sharp knife score the skin of the pork belly in a checkerboard design.

In a bowl combine the salt, pepper, sage, thyme and garlic. Rub the pork belly on both sides with mixture until evenly coated. Place pork belly in a roasting pan skin side up. Place in the oven and bake for 3-1/2 hours, turn oven to broil and cook for 10-12 minutes until the skin puffs up evenly. Remove from oven and let rest for 30-40 minutes at room temperature.

Using a serrated knife, cut the meat into 1/2-inch-thick pieces and reserve.

Place the honey, Maker’s Mark® Bourbon, vinegar, butter, salt and pepper in a large sauté pan. Place over medium high heat and reduce by a third. Place the pieces of crispy pork belly in the pan and increase to high heat. Cook until syrupy and glazes the pork belly. Remove from heat and keep warm.

Plate the meat, drizzling the remaining sauce atop and on the plate.

Wednesday, February 09, 2011

Makin’ Bacon

I have always loved cooking with my children. When they were little, they would sit on the counter and help add ingredients to the mixing bowl, happily licking the beaters afterward. They would stand on stools and stir pots, picked veggies from the garden to help make salads, and gleefully made my nana’s shortbread recipe, which they would mix only with their hands, butter and sugar gushing between their little fingers. But I still enjoy that kitchen time with my kids today, even though they are adults.


Brilliant Daughter is my frequent companion in both savory and sweet endeavors, and was my collaborator on Eat Drink Merry. She is my canning assistant every spring, summer, and fall and often brings some really good recipes to light. I spend far less often in the kitchen with Butcher Son and, not surprisingly, the main ingredient involves meat of some kind. We’ve tried more than a few sausage recipes and he experiments with marinades on a regular basis. More recently we have had a yen to try our hand at smoking.


So we started out with pork belly. Butcher Son brought home two slabs for us to try our hand at smoking.


I had purchased a bacon cure when we were out visiting family in Colorado last January (and which caused me a bit of grief at the airport due to its nitrate/nitrite content.) I poured over several of the books I had (Smoking Food: A Beginners Guide and Jam It, Pickle It,, Cure It) and came up with a bit of a hybrid cure. I mixed it up, rubbed it on and sealed the two slabs in Ziplocs. (I should note here that there was one small hesitancy on my part when rubbing up the belly. There were actually nipples on the belly, which were so pale and small, you might have missed them, but which was a vivid reminder—to me—that I was looking at what had been an animal. Some might find this a bit uncomfortable, but it is the reality of what feeds us.)


Each day I checked the plastic packages in the fridge, turning them over and poking and prodding to see how they were coming along. They were probably ready after seven days, but there was one little problem: We didn’t have a smoker. No one we know has a smoker. So, Butcher Son, who has a knack for being creative, asked around and found someone willing to donate an old Weber barbecue for transformation. And boy did it need some transforming.


When the Weber landed in our driveway it was a rusty, dirty, falling apart hunk of metal. But on his lunch hour Butcher Son took it apart and started cleaning it. He washed, he scrubbed, he sanded. Then the thing literally fell apart in his hands. So on his day off, he redrilled holes, put the legs back on with reinforcement, scrubbed some more, and then headed out to buy some charcoal and wood chips.


Last Thursday he assembled the grill, and we began the process to cold smoke the pork belly, after a 10-day cure in the refrigerator. For four hours, I babysat the smoker, adding coals and wood chips as needed, making sure that smoke was still curling out of the upper vents. I watched as the pork belly went from pale white to faintly brown, to heavily tea-stained slabs. I worried that the coals weren’t hot enough, that they were too hot, that they would go out. But everything went well. And we had our first product.


Friday morning, we sliced it up and fried a few the bacon on the stove. I always find it more gratifying to eat the things I have taken the time to make. In fact, I always prefer to make things from scratch and if I had all the time in the world, I would probably make just about everything myself. But I am a realist and I cannot store all the ingredients or equipment needed and I will probably never have that much time. (Now I understand why large families were the norm back in the day, as it takes a lot of hands to make your daily bread and butter…literally.)


And despite my worrying, the bacon tasted great. Smoky, not too salty. And really not all that hard to do. Just takes time and patience, and a little creativity from my son.