Monday, December 31, 2012

Chocolate Fondue: A New Year’s Tradition


For the last 20 years we have rung in the new year in the quiet of our own home, preferring to stay clear of the drunken hordes (although we often drink a bit too much bubbly ourselves). We start off with cracked crab, sourdough and a salad, move to a selection of movies (often a trilogy of some sort), and then top it off with chocolate fondue and champagne. Not a very heart healthy way to celebrate, but this kind of spread only happens once a year, so we indulge and pay for it later.

This year we were invited to a New Year’s Eve game night at the Resort at 292, neighbors of Brilliant Daughter. We thought we would break tradition, as they are a fun-loving bunch, we can walk home from their house, and we love games! Because they had already decided on having a taco bar, the cracked crab got nixed, but I was adamant about the chocolate fondue. Gotta preserve at least one thing from this annual celebration.

This year I decided to try using the crockpot to melt and serve the fondue, since a crowd was expected. I have two Pound Plus Dark Chocolate Bars from Trader Joe’s and 2 cups of whipping cream. After breaking up the chocolate and adding it with cream, I turned the pot on low, covered and checked every 20 minutes with a quick stir. It was ready in a little over an hour, at which time I turned the pot to warm and it sat patiently waiting for another hour or so.

I brought much of the traditional dipping items: fresh pineapple chunks, Cutie mandarin wedges, banana slices, fresh strawberries, Sara Lee pound cake and, new this year, homemade chocolate marshmallows.

I’ve made marshmallows several times this year, usually to pair with homemade graham crackers and dark chocolate for s’mores, but wanted something different. And you can never have too much chocolate. The recipe I pulled was from Saveur, and differs from my vanilla marshmallows in that it had no egg whites. The texture and consistency is definitely different. The egg white version is a bit fluffier, less dense. But both are tasty. I definitely suggest you give them a try. 

Michael Kraus, Saveur.com
I’ve included the recipe for the chocolate marshmallows below. The one trick I can impart to make the process easier: once you have taken the marshmallow out of the pan, use a piece of dental floss to do the cutting. I slide the floss under the brick and then cross the two hands over each other, which cuts a nice slice. Move the cut log away from the brick and dust with the chocolate powder mixture. Repeat until you have 5 or 6 logs. Then you can either use the floss to cut individual marshmallows, or use a knife or kitchen shears to do so.

These are also heavenly floating in a cup of hot chocolate.

Canola oil, for greasing
1 ½ cups sugar
¾ cup light corn syrup
¼ cup honey
½ cup water
3 tablespoons unflavored powdered gelatin, softened in ½ cup cold water
½ cup Dutch-process cocoa powder, sifted

Dusting Powder
¼ cup Dutch-process cocoa powder
2 tablespoons cornstarch

1. Grease an 8x8-inch baking pan. Line bottom and sides with parchment paper, and grease paper. (I use small banana clips to secure the paper to the edge of the pan.) Grease a rubber spatula; set aside.

2. Combine sugar, syrup, honey, and 1/2 cup water in a 2-qt. saucepan over medium-high heat. Bring to a simmer; cook, without stirring, until syrup reaches 250 degrees on a candy thermometer. Remove from heat; let cool to 220 degrees.

3. Sprinkle gelatin over ½ cup of water and then bring another 1⁄2 cup water to a boil in a small saucepan. Place bowl of gelatin over the boiling water; whisk until gelatin becomes liquid. Transfer to the bowl of a stand mixer fitted with a whisk; add 1⁄2 cup sifted cocoa powder and cooled sugar syrup to gelatin; whisk on high speed until mixture holds stiff peaks, 5–6 minutes. Pour mixture into prepared pan; smooth top with oiled spatula; let cool until set, 5–6 hours.

4. Combine ¼ cup cocoa powder and cornstarch in a bowl and transfer to a strainer; dust work surface with mixture. Slide a knife around edge of pan to release marshmallows; remove from pan. Dust cocoa mixture over top. Using a slicing knife dusted with cocoa mixture, cut marshmallows into squares. Toss marshmallows with remaining cocoa mixture.
Sunday, December 30, 2012

An Unconventional Way to Serve Morning Oatmeal


I like my morning bowl of oatmeal on cold winter mornings. It warms my soul, fills my belly and is a healthier alternative to most breakfast foods. I can also doctor it in a myriad of ways: fresh fruit, dried fruit, crystallized ginger, chocolate chips, brown sugar, chai spices….the list could go on forever. So I was pleasantly surprised to happen upon a recipe on Pinterest—a hazardous time suck—for baked oatmeal. Even better, it is baked in muffin tins so it is portable and reheatable. It's one of those recipes you could make on Sunday morning for the family and then have leftovers for the week to come. Bonus time saver and you can feel good about feeding these to the family (and yourself).

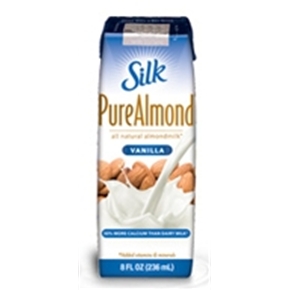
One unusual but important ingredient is the vanilla almond milk. The sweetness of this product is key to the flavor of the oatmeal. Almond milk has 50% more calcium than dairy milk with roughly the same calorie count as skim milk. It contains no saturated fat, cholesterol, dairy or lactose ingredients and it is a healthy alternative for everyone, save those with nut allergies. And for those who do not use it on a regular basis, you can purchase 8 ounce (1 cup) individual tetra paks, which is the perfect amount for this recipe.

I tried this recipe with both dried wild blueberries (a Trader Joe’s must-have with their intense blueberry flavor) and mini chocolate chips. I think it would also work well with The Ginger People’s Bakers Cut Crystallized Ginger Chips, although younger palates may not appreciate the substitution. I loved both, as did Mr. B. I am waiting for the rest of the family to weigh in.
hot and steaming right out of the oven

So, think about simplifying life a bit, and whipping up a batch of these over the weekend once or twice a month and providing a healthy alternative to a bowl of cereal or morning toast. Your taste buds and waistline will be happier for it.

3 ripe bananas, mashed
1 cup vanilla almond milk
2 large eggs
1 tablespoon baking powder
3 cups old fashioned or rolled oats
1 teaspoon vanilla extract
½ cup dried wild blueberries or mini chocolate chips

Preheat oven to 375 degrees.

Mix all ingredients except the chocolate chips together, and allow to site for a few minutes.

Prepare 16 muffin cups with paper liners or non-stick spray.

Stir the blueberries or chocolate chips into the oatmeal batter, incorporating well. Spoon batter into the prepared muffin cups. (I found that a large ice cream scoop uses the perfect amount of batter).

Bake 20-25 minutes. The edges should just be starting the brown and the muffins will be firm to the touch.

Remove from pan. If using paper liners, let the muffins cool for several minutes so they do not stick to the liner.

Saturday, December 15, 2012

Eating Suburbia Spawns a Cookbook

-->

Three years ago, Brilliant Daughter and I embarked on a journey to document all of our favorite recipes and publish a cookbook. Hence Eat Drink Merry was born. That volume contained many of the recipes on this blog. Some were handed down from my grandmothers or shared by my mother-in-law, others came from food blogging friends or published sources, and then there were the creations of our own design. We were touched by the immense response and gratitude from those we gifted with a printed copy. So, we decided to do it all over again, just for them.

This time around we wanted to personalize the book in a different way, a way that would be recognizable to the wonderful people who have sat down to a meal with us, cooked in our kitchen, and shared our lives.  They all know that for us, as it is for many families, the center of our household is the kitchen. Whether scrambling eggs for a simple family breakfast or serving Christmas Eve tamales to 50 guests, we naturally gravitate to this space on a daily basis. For fifteen years, the focus of our kitchen was a 4x6-foot standard schoolroom chalkboard. Our “communications center,” this utilitarian wall décor served us well, keeping track of shopping lists, phone messages, chore duty, family contact information, and, during holidays, became an oversized greeting card for our guests. And although it was retired when we remodeled, the fond memories linger and became the inspiration for the cover of our new cookbook, which we named after this blog.

The blog, born in 2006, has always been a labor of love, a way for me to share not only great recipes with friends and family, but to allow a glimpse into our personal—and fairly typical—suburban life.  I firmly believe that those of us in suburbia need to break out of the roast chicken, barbequed ribs, pork chop mentality and spice up our kitchens with the food of the world. We need to leave the canned veggies, packaged cookies, and oversweet jams on the shelves, and dig into the garden and flour bag and treat our families and ourselves to something better. Hence the blog and these cookbooks, which keep me happily covered in flour and bacon grease much of the time!

Perusing through my posts, I find that my cooking style and habits have evolved over the years. I now experiment with higher-end ingredients, adapt recipes to suit what comes out of my garden rather than the store, and I no longer have the pressing need—due to school and athletic activities—to prepare the majority of our food in advance or in a rush. Our lives have slowed down a bit, as I now work from home, and I relish the time I can spend in my renovated kitchen, in the large suburban garden that my son helped build, and take the time to share new recipes with my family during our weekly Sunday dinners.

I am aware that not everyone has such luxuries; life, children, work get in the way and minimize the amount of time in the kitchen.  To that end, the cookbook still contains quick and easy-to-fix recipes, and we’ve found new tricks to make life a bit easier when time is short. For time-crunched cooks, whole roasted chickens and conveniently chopped vegetables are available at almost every grocery store and can be used in several of the recipes.

New this year is a section of appetizers—tried and true recipes–like our holiday ceviche, quick caprese skewers, and our new favorite gazpacho shooters (first served this summer at our son’s engagement party). Ten lunch items also grace these pages; several tasty sandwiches and salads, as well as a really simple Asian Noodle dish with a Thai flair.

But we haven’t forgotten the basics: Breakfast, Dinner, Sides and Sweets, not to mention our free-for-all miscellaneous section—titled Other Flavors this time around—that contains the best 5-minute artisan bread that will ever come out of your kitchen. (No kidding!) We’ve tried to cover a lot of bases and provide you with some lip-smacking ideas.

For a limited time, you can download an e-version of the new cookbook free. Just click here. In late January, the book will be available on Amazon in both hard copy and e-version for $14.95. 

So delve in, try a few things, and let us know what you think. We’re not above criticism or praise and we appreciate the feedback.

—Mrs B and Brilliant Daughter

Friday, December 14, 2012

Caprese ala Chrismukkah

-->
On the first night of Hanukkah, I was invited to a Chrismukkah party in my neighborhood. He’s Jewish, she’s not—thus the hybrid. My neighbors know my foodie nature, so I knew I had to bring something good. Problem was, I was feeling uninspired.

from Veggiewala.com
The hostess actually found the perfect item on Pinterest (don’t you just love that site?). I took the caprese wreath just one step further, because this isn’t just a Christmas party, after all! Instead of the wreath shape, I decided to do it in the form of a Star of David (which is most appropriate, since the host’s name is David).

Ingredients
1 12-ounce package grape tomatoes
2 packages Ciliegine mozzarella, drained
Balsamic glaze (available at Trader Joe’s)
1 bunch basil

Tools
12-inch Styrofoam circle, 1-inch thick
Small hand saw with fine blade
Woodsies craft picks, toothpicks
Foil

The 12-inch Star perfectly held 45 skewers. To create a Star of David, all you need is a triangle template. Just remember that all sides have to be the same length to make a perfect triangle. Do this twice. Invert one triangle and place on top of the other, so that their centers align. Trace out the shape and cut with a fine-blade hand saw (though a knife will do in a pinch).


Cover the star in foil. Take the largest leaves of basil and place over the foil-wrapped Stryofoam. Angle the tip of the basil outward, and overlap as needed. I broke toothpicks into thirds and used them to tack down the leaves. Just make sure to push them in almost the whole way.

Rip the remaining basil leaves into pieces roughly the same size as the tomatoes. Skewer a mozzarella ball, followed by a tomato, and finish with a basil piece. Starting with the point, insert the pick into the Styrofoam until the basil leaf is touching. Repeat this with each point of the Star (should fit six). Place a dipping bowl in the center and then fill in the remaining gaps (I fit another 9). Add in the balsamic glaze and serve.  


It was a hit—not to mention, delicious!

Need more Chrismukkah ideas? Check out the tree toppers over at CraftingSuburbia.com

Wednesday, August 22, 2012

Summertime Ceviche


We love, love, love ceviche and it’s a great summertime staple. Fresh, healthy, low in fat and calories, it’s a great appetizer and can be served with tortilla chips, atop a crispy tortilla, or in a fancy schmacy martini glass as we did this week.

It’s a perfectly acceptable diet food and fits in well on the whole foods diet I am trying to maintain. Full of bright flavors from lime, cilantro and peppers, it only takes a few minutes to make (and then several hours to marinate). Most of the effort is in the chopping of ingredients, but it is well worth it. 


I just assemble all the ingredients, spend a little time with my knife and a chopping board, and pour it all into a large, non-reactive bowl. A few hours in the refrigerator and you have a tasty treat. So what are you waiting for?


Mrs. B’s Ceviche

½ pound bay scallops, diced
½ pound raw, peeled and deveined shrimp
½ cup red onion, minced
2 peppers, seeded and diced (jalapenos, pasilla, Anaheim)
3 Roma tomatoes, seeded and diced
2 garlic cloves, minced
½ cup chopped cilantro
8 ounces fresh lime juice (approx. 8 limes)

Mix all ingredients in non-reactive bowl (ceramic, glass, plastic). Cover with lid or plastic wrap and refrigerate for 4+ hours, stirring occasionally.

Yield: 4-6 servings


Monday, August 20, 2012

Getting Back on Track with a Healthy Diet


Sometimes life gets in the way. I’ve been neglecting a lot these days, probably from an overdose of obligations that took me in unexpected directions or maybe from a lack of focus. I don’t know, and it really doesn’t matter to me why. What does matter is that I need to get back on track, take more control of my life, and particularly my health.

I find myself pulled in too many directions, not able to settle on specific tasks at hand; not a good thing when you’ve started a new job. So I need to buckle down and concentrate on the things that matter. So in addition to working again, I need to find the time to exercise and return to a healthier eating regimen. Not that I’ve been dining on pizza, burgers, and processed junk food, but I also have not been getting my allotted fruits and veggies (despite my healthy backyard garden). So in an attempt to rectify, I have borrowed Brilliant Daughter’s juicer and stocked up on a glorious bounty of fruits and vegetables.

I’m going to make my body happier and healthier with what I call a whole foods diet. That doesn’t mean that I only shop at Whole Foods, it just means that the food is unprocessed, fresh, lean, and healthy. You know, fruits and veggies, whole grains and legumes, lean proteins. Cut out the processed crap, sugar, and a fair amount of dairy. It takes a bit of thinking and preparation, not to mention cost, but if I can reconnect with all these good foods on a regular basis, then I can slowly introduce some whole grain breads, some cheese, and the occasional sweet treat and end up with a more balanced diet.

My first stop was Sigona’s, our local greengrocer. You can find just about any kind of fruit or veg here, and I loaded up the cart, walking out $100 lighter. In fact, I had a hard time finding room in the fridge or on the counter for all I bought. But it brings a smile to my face seeing all the good fresh fruit (and makes me want to go on another canning binge!).

The goal is to have freshly pressed juice every morning, occasionally made into a smoothie with some nonfat plain Greek yogurt. For lunch, another glass of juice and a whole foods salad of some kind. Dinner will be grilled, poached or roasted lean protein (fish/seafood, poultry, beef filet) or grain-legume combo (brown rice and beans), along with vegetables.  I’ve got some nice fresh fruit and raw almonds for snacks, and some home-brewed decaf and herbal iced tea to sip on. I’m not giving up my morning coffee and see no need to.

Today’s breakfast concoction consisted of a mixture of blueberries, kiwi, apples and pear. Blueberries have a very high antioxidant component, kiwi contains a high level of vitamin C and potassium, apples have high levels of polyphenols that contribute to their antioxidant capabilities, and pears bring a nice sweetness and mellowness to this breakfast cocktail. It was quite a tasty beverage, if I do say so myself.

I have also purchased a Tuscan melon, grapes, papaya, mango, pineapple, oranges, bananas, ginger and limes, and have strawberries from the garden. I can also add in coconut water, almond milk, or the yogurt for variation. I also bought celery, carrots, kale and avocado for more savory drinks, and can pull beets and chard from the garden. (Too bad I don’t like cucumbers, because I have an overabundance of lemon cucumbers in the garden that could easily be used in a veggie juice. )

Today for lunch I made what is labeled a Superfood Salad. The recipe is pretty easy to make and makes 4 one-cup servings. It has a base of quinoa, with onion, avocados, black beans, fresh corn, orange, cilantro and pomegranate arils (seeds) and is tossed with a lemon vinaigrette (from my own Meyer lemons). I whipped it up and divided the salad into four Tupperware containers for lunches. (Both Butcher Son’s girlfriend and Mr. B will be taste testers.) My daughter has eaten this with poached prawns, and I think you could also add grilled fish or chicken if you wanted the extra protein. And it’s something even kids should like, not to mention it is a pretty salad, full of color and flavor.


Superfood Salad

1/2 cup dry quinoa
1/3 cup red onion, chopped
1 orange, peeled and segments chopped
1 avocado, chopped
1 cup canned black beans, rinsed and drained
1 cup pomegranate arils (about 1 pomegranate worth)
1 cup fresh corn kernals (can use thawed frozen as well)
1/3 cup cilantro, chopped
salt & pepper

Lemon Vinaigrette:
¼ cup lemon juice
2 garlic cloves, microplaned or finely minced
dash of sweetener (agave nectar, stevia or white sugar)
salt & pepper
6 Tablespoons extra virgin olive oil

Cook quinoa according to package directions. Set aside to cool.

Make lemon vinaigrette by combining all ingredients in a jar with a tight-fitting lid. Shake to combine.

Assemble remaining salad ingredients in a large bow. Add quinoa once cooled. Toss gently.
Reshake vinaigrette and pour over the salad. Stir to combine.

Refrigerate and eat within 48 hours.